Pasture-Raised Eggs Made Easy!
 If you’ve ever tried our pastured-raised eggs, you know how eggcellent they are. Bright orange yolks; sturdy, perfect-for-hardboiling shells; and uncommonly good taste. But have you ever wondered what goes into pasture-raising? Or wanted to try doing it yourself?
Although the practice of pasture-raising has yet to be formally defined, it’s generally agreed to signify a few crucial things. First, the animal is free to spend his/her days roaming spacious plots. Second, a significant portion of the animal’s diet comes from the live worms, grubs, seeds, and grasses foraged on that plot. And third, the plot must be organically certified.
First, in order to ensure that the birds receive adequate natural nutrition, you will need to construct a movable coop—sometimes called a “chicken tractor”. Not only will this afford the hens ample fresh pasture, it’ll also serve as a natural means of controlling weeds and insects, as well as providing natural fertilizer in the form of manure. Examples of movable chicken coop can be found here.
After you’ve constructed your coop, you’ll need to choose which breeds best suit your situation. An average chick costs around $2, with adults clocking in around $40. The breed’s temperament, its adaptability to confinement, how noisy it is, and the size eggs it lays are all factors you’ll want to consider. Certain breeds fare better in hotter climates; others prefer cold. A few versatile varieties include the Rhode Island Red, the Leghorn, the Buff Orpington, the Black Star, and the Ameracauna. PawNation has a great page about breed selection.
Now that you have your land, coop, and birds, you’ll need to consider supplementary nutrition. True, pasture-raised hens derive much of their diet from the pasture they feed on, but they will absolutely need feed, especially in the winter. Feed can be purchased at a local feed store, or, if you have enough acreage, home-grown!
Of course, you’ll also need to regularly check your birds for health, providing them with plenty of fresh water, and keeping their living areas clean. Keeping them safe from predators and ensuring environmental sustainability are other important concerns.
 So what are you waiting for? Go get some chicks and get started!
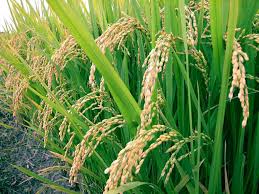
A Brief (and Interesting) History of Rice!
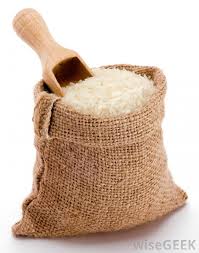 Ever since we at Blue Moon started growing our own rice, I’ve found myself wondering about its history. Where did it originate? How long have we been cultivating it? What makes it so special? Rice, it turns out, is a fascinating crop—and not only because of its history.
When you get right down to it, rice is basically a seed—a grass seed. There are two major types of rice: Indica and Japonica. Indica is the non-sticky, flakey, long-grained variety; Japonica is the sticky, short-grained variety. Basmati and jasmine are two well-known indica rices; sushi rice and Arborio are two well-known Japonica varieties. Indicas are generally grown near the equator, the Philippines, India, Pakistan, Indonesia, etc. Japonicas, on the other hand, are grown in temperate and mountainous regions, including Japan and Korea.
According to Chinese legends, rice domestication began under Chinese Emperor Shennong, the inventor of Chinese Agriculture. (Though from what we know about emperors’ propensity for self-aggrandizement, we would do well to assume it was invented by one of his minions!) More reliable genetic evidence shows that rice originates from a single domestication some 8,200 to 13,500 years ago, in China’s Pearl River valley region. From there, it was introduced to Europe, and later the Americas.
These days, rice plays an enormous role in global nutrition. It’s the staple food for over half the world’s population, providing 20% of total global dietary energy supply. It provides more than one fifth of calories consumed by human beings. And it’s the agricultural commodity with the third-highest worldwide production, after sugarcane and maize. All of which is to say that rice is a pretty big deal!
Rice’s history is a long and interesting one, and we at Blue Moon Acres are humbled to play a small part in its future.
5 Cheap and Easy Ways to Build Your Own Micro-Greenhouse!
When we think of greenhouses, most of us think of hulking, ship-like monoliths made of plastic or plexi-glass. But greenhouses can be small, too. Small enough to fit in your back yard, in fact. Or even in the palm of your hand.
A greenhouse, as defined by Merriam-Webster, is “a structure enclosed (as by glass) and used for the cultivation or protection of tender plants.” Greenhouses allow for more control over the growing environment of plants. Temperature, sunlight levels, fertilizer and water amounts, can all be regulated. Plants are protected against the worst of the elements, extending the growing season. And while most greenhouses are large, there’s no hard and fast rule where size is concerned. Below are five examples of truly mini greenhouses!
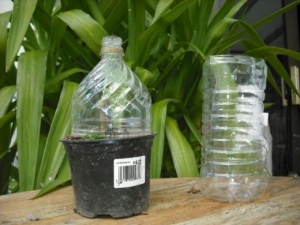
What could be simpler? Or littler? Simply remove the top and the label from an (empty!) soda, juice, or water bottle; and turn upside down! Can be used directly on the ground, or around a small planter.
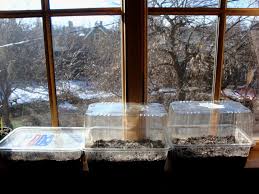 2. Plastic salad-greens container
How ironic! A product that once held greens being used to grow… greens. But anyway. The picture pretty much says it all, but for those of you who prefer narration: fill bottom of container with topsoil and seeds, and cover with either lid or another container. Check out this video for another take on this easy garden hack.
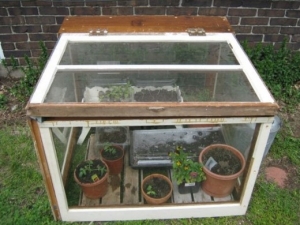
My personal favorite! Brace four old windows together, using a fifth window as a lid. The base can be made from an old pallet or crate, or even a simple raised bed. A superbly effective way of not only extending your growing season, but keeping those old windows out of a landfill.
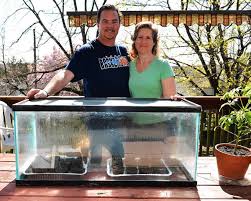
Look how happy that couple is with their aquarium greenhouse! Simply take your old unused aquarium greenhouse, turn it over, and, voila: instant greenhouse!
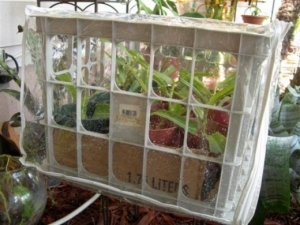 5. Milk Crate and Comforter Bag
If you’re like me, you saved the plastic bag that your comforter came in, thinking you would use it to store your comforter come summertime. But you’re not that kind of person, which is good news, because now you have a perfectly good excuse to build a very cool mini-greenhouse. Just get an old milk crate and place it inside the comforter bag! You’ll be sprouting seeds in no time!
The Season Grows Nigh: Planning for 2015
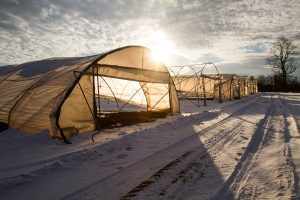 Though spring may seem a long ways off, we at Blue Moon have already begun to prepare for the 2015 growing season. Planning begins as early as the summer, but ramps up in earnest around the winter solstice. From seed-sourcing to crop rotation-planning, there’s much to do in these cold months.
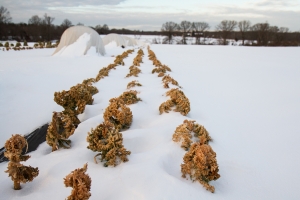
As early as late summer, we begin by assigning cover crops to specific fields and plots. A good winter cover-crop—radish, rye, oats—protects the soil against erosion and ensures continuity of essential biological processes. With the arrival of consistent hard frost, we remove and compost residual summer and autumn crops. Mulch is applied to blueberries and other essential crops to prepare for the following spring. This ‘winterization’ is as much about protecting the fields from harsh winter elements as it is about clearing the way for the next year’s growing season.
Once the winterization is complete, we gather to review the previous season’s successes and failures, so as to be better prepared for the coming year. New crops are introduced; some are jettisoned. A large seed order is then placed—as early as possible, to ensure we get what we need. At this time too, we finalize our crop rotation plan. Crop rotation, planting different crops on different fields each year, hedges against soil nutrient depletion, ensuring a healthier, stronger, more disease-resistant plant. And finally, we purchase fertilizer and other components to add to our amazing compost.
After the orders have been placed, we begin the seeding process. Early January sees the planting of cold-weather loving crops—kale, cauliflower, cabbage, and broccoli— in heated greenhouses. Come February, these seedings will be large enough to be transplanted into our high tunnels. And by the end of March, weather permitting, our first crop of baby lettuce heads will be ready to be harvested!
There’s always something to prepare for on the farm. Fortunately we have the winter to get it all done!

